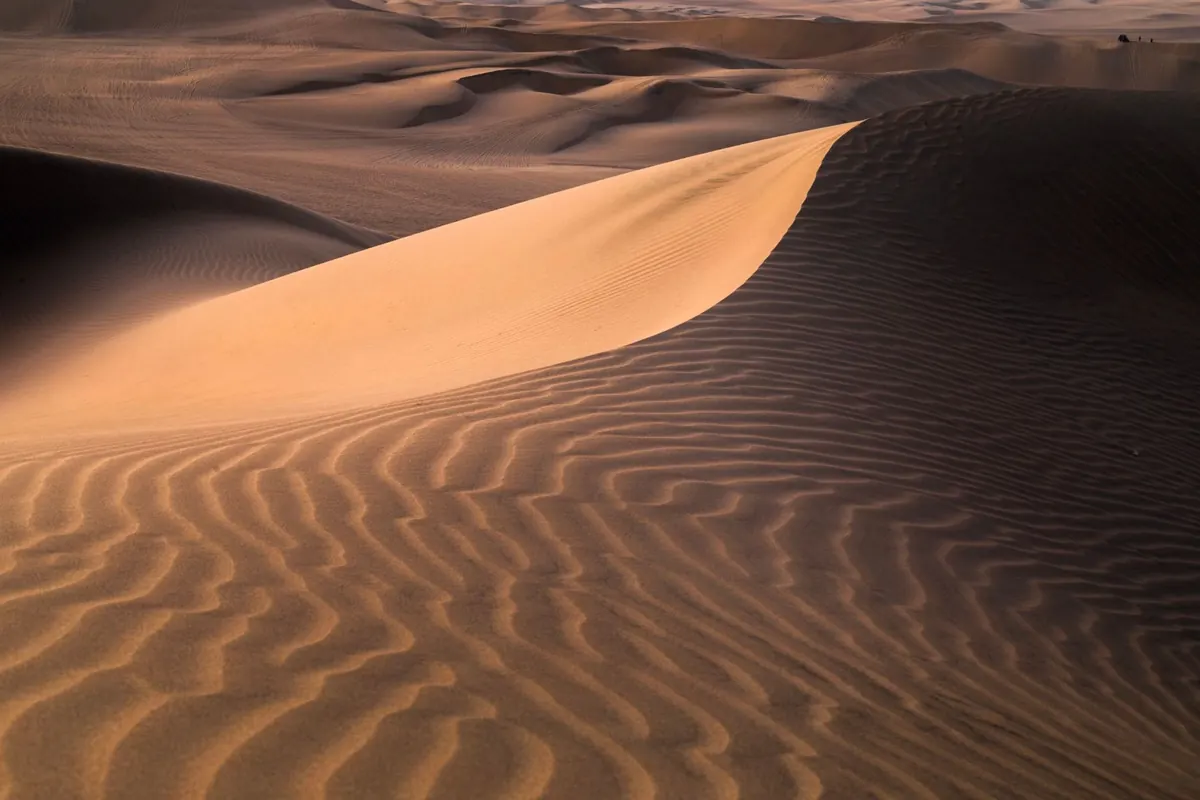
Sand dunes at golden hour are generous and cruel in the same breath. The light turns a crest into a ribbon of orange fire, shadows stretch long and violet, and every ripple reads like a line drawing. Then you press the shutter, and the finest part of the scene — that glowing ridge — comes back as a white smear with no grain in it at all. The fix isn't a secret setting. It's learning where the brightest sand sits, exposing for it, and building the picture around the light you can actually hold.
Why Dune Light Is Hard to Hold
Sand is a bright subject pretending to be a dark one. Dry, sunlit dune faces bounce a great deal of light back towards the camera — far closer to a pale grey card than the deep shadow your eye makes of them. Meanwhile the shaded slip faces fall away fast. Put both in one frame at golden hour, with the sun grazing along the ridge, and the contrast can sit well beyond what the sensor records. Your eye copes without complaint. The camera does not.
The second trap is the meter. It assumes the world averages out to a mid-tone, so when you point it at a glowing crest it darkens the sand to grey. Meter the shadow instead and it brightens until the ridge turns to paper. Neither reading is wrong; both need correction. Take manual control and the whole business becomes predictable.
Expose for the Brightest Sand
Work in manual. Set your base ISO — usually 100, sometimes 64 — and an aperture between f/8 and f/11 for sharpness across the frame, then let shutter speed take the strain. Turn on your highlight warning, whatever your camera calls it, because a rear screen in bright light lies to you.
Find the brightest patch of sunlit sand in your composition and spot meter it. Dry sunlit sand generally sits around a stop brighter than a mid-tone, so from that reading add roughly +1 EV and check the result. Wet sand, red sand and dark volcanic sand all behave differently, so treat that figure as a starting guess rather than a rule.
Read the histogram properly
The histogram is the only honest judge. You want the data pushed towards the right-hand side, close to the edge without stacking against it. A slim spike at the far right is usually fine — that's specular sparkle. A solid wall of clipped pixels means the detail in the crest is gone for good.
Bracket when the moment matters
If the light is extraordinary and you may not pass this way again, shoot three frames a stop apart. Blending later is easier than driving back. Review the highlights after each burst, not the thumbnail.
Composition: Let the Shadows Do the Work
Golden hour on dunes is really about angle. Cross light, with the sun roughly at right angles to the ridges, is what carves out ripple texture and gives sand grain and form. Front light flattens everything into a yellow carpet. Backlight gives you glowing crests, sand streaming off the top and shadows reaching towards the camera.
A few things worth trying:
- Hunt for a clean S-curve in the ridgelines, then place it so it leads into the frame rather than out of it.
- Use the shadow line itself as foreground — the curve where lit sand meets shade is often stronger than any object you could find.
- Add scale with one small figure on a distant crest, and keep them small.
- Switch to a telephoto and stack ridge behind ridge for compressed layers of light and shade.
- Move in close for abstract ripples, but shoot across them rather than down at them, or the texture dies.
Watch where you walk. Footprints across a pristine face will spoil someone else's photograph as well as yours, so follow existing tracks or keep to the shaded side.
Filters, Lenses and Settings Worth Knowing
A circular polariser is the obvious tool for sand, and it works — but use it carefully at golden hour. It cuts the glare that gives warm sand its shimmer, and it costs a stop or two just when light is scarce. Take a frame with and without before you commit.
Graduated neutral density filters are awkward here, because dune horizons rarely sit level. A soft grad placed with care can help in a flat, wide scene; usually you are better off exposing for the highlights and lifting the shadows later.
Take a tripod. Not only for low light, but for the small apertures, the bracketed sequences and the longer exposures you may want once the sun has gone.
Lens choice changes the picture more than most people expect. A wide angle exaggerates the foreground sweep and makes a dune look vast. A 70–200mm compresses distant ridges into layers that feel almost abstract. Carry both if you can, or pick one and commit to it. Pack the unglamorous things too: lens hood, blower, cloth and a zip bag for when the wind picks up.
Editing Without Flattening the Texture
Highlight recovery is a powerful slider and an easy one to overuse. Drag it too far and sand turns grey, flat and slightly plastic, losing exactly the quality you went out for. A gentler approach works better: pull the highlights back modestly, then use a graduated or radial mask over the brightest area with slightly less exposure, keeping the warmth intact.
Lift the shadows enough to reveal shape in the shaded faces, but no further. Deep shade with real black in it gives sunlit sand something to push against. Warm the white balance a touch if the evening needs it, and resist the vibrance slider — over-saturated sand reads as fake within seconds. Sharpen moderately. Clarity and texture sliders add punch to stone and rust, but pile them onto dunes and the ripples start to look like gravel.
A Golden Hour Plan You Can Repeat
Arrive early. An hour before sunset, in decent light, you can see the shapes, choose where to stand and find a foreground instead of running at the last glow. Then work in this order:
- Set base ISO, f/8 to f/11, manual exposure, highlight warnings on.
- Meter the brightest sunlit sand, add a stop, check the histogram, adjust the shutter.
- Shoot the cross-lit ridges while the sun is still up — that is when texture is at its best.
- Change lenses before the light peaks, not during it.
- Stay for the afterglow. Once the sun drops, the light softens, shadow detail opens up and the dunes go mauve and blue for a few minutes.
One last thing. Dunes are disorienting even in daylight, the temperature falls quickly after sunset, and sand gets into everything. Carry water, note your route as you go, keep the bag zipped, and check local rules before flying a drone or walking into a restoration area. Get the exposure right and the desert does the rest of the work for you.
Photo: Trace Hudson / Pexels